


Getting Started
Thank you for purchasing a Minimillr Desktop CNC Mill. Many creative possibilities await! This guide is intended for more advanced users who will be using the Minimillr for 2D and 3D geometry such as milling STL files created in a CAD package. Candle or Universal GCode Sender is the recommended software used to control the mill.
This getting started guide uses pre-prepared gcode file that can be downloaded here: hello.nc
You can also download the STL file here
Package Contents
Each Minimillr package contains:
1x Minimillr desktop CNC mill
1x 24V power supply
1x USB cable
1x Spindle control box (4015 models only)
1x Quick Start Guide with accessories
Connecting the Mill to Your PC
Connect the mill to your PC with the USB cable. Connect the 24V power supply to the mill.
In most cases, Windows 10 and Macs should automatically recognise the Minimillr as a USB Serial Device and install the correct drivers. If not
Insert the memory stick and run “Install Driver” to install the USB-Serial driver. The driver is available to download here as a ZIP file, and here as an EXE file. Run setup.exe once downloaded/extracted.
Visit https://minimillr.com/drivers for the most up to date information and driver downloads.
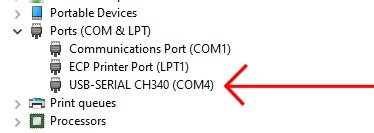
You can check in Device Manager if the drivers are installed, as the mill will appear in Device Manager under the Ports section as shown the image below. Make a note of the COM port number, e.g. COM4
The mill should be connected for it to show in Device Manager. Be aware that changing USB ports will change the allocated COM port.
Setting up ‘Candle’ (Machine Control and GCode Sender)
Candle 1.1.7 is the recommended software for controlling the Minimillr. It is used for sending GCode to the mill. It can be downloaded here: https://github.com/Denvi/Candle/releases/download/v1.1/Candle_1.1.7.zip
Locate the zip file in your Downloads folder and extract the files to your preferred folder on hard drive.
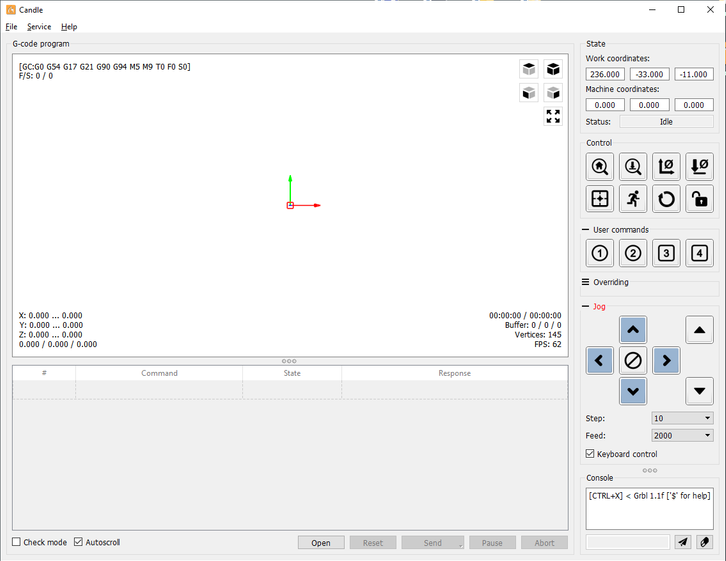
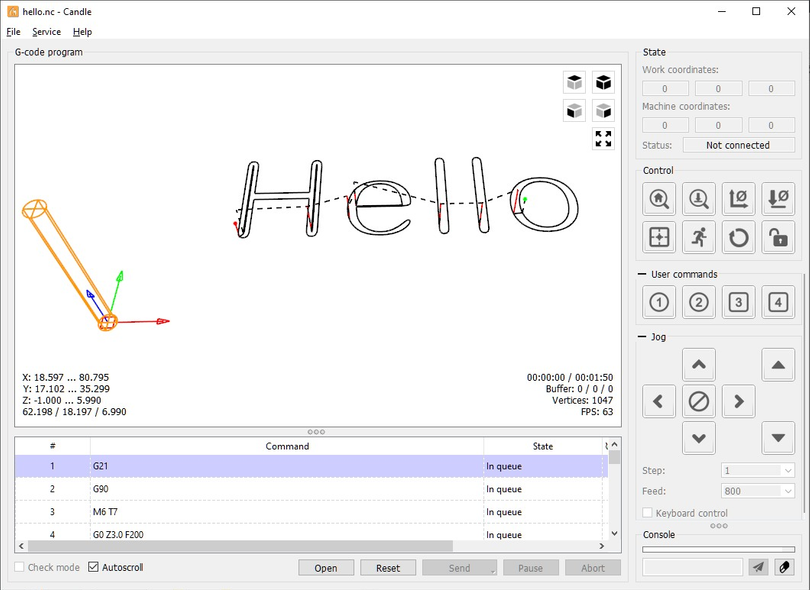
Open up the Candle folder and click on Candle.exe to launch the program. The interface should look something like this:
Setting Up the COM Port
Candle needs to know the correct COM port of the mill so it can connect. Click on Service>Settings and set the COM port as per the one in Control Panel. Usually this will not be COM1, but the other COM port listed. Click the refresh icon if no ports are visible.
Set baud to 115200 (default setting).
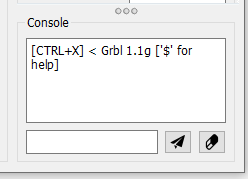
A successful connection will show ‘Grbl 1.1g’ in the console as shown below.

Jogging the Mill
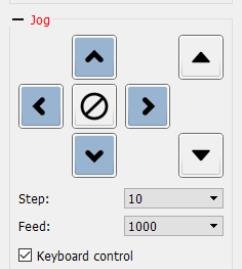
Open the Jog panel in Candle and set the Step amount to 10mm, and the Feed to 1000mm/min. Use the arrows to move each axis and get to know the directions of movement.
A keyboard with a NumPad can be used to jog the mill if the ‘Keyboard Control’ checkbox is selected. Axis movement is as follows:
- X axis: Numpad 4 and 6
- Y axis: Numpad 8 and 2
- Z axis: Numpad 9 and 3
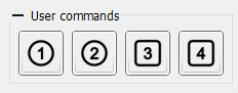
Setting Up User Commands
For convenience it is worth setting up some user commands that are allocated to the 4 buttons on the interface.
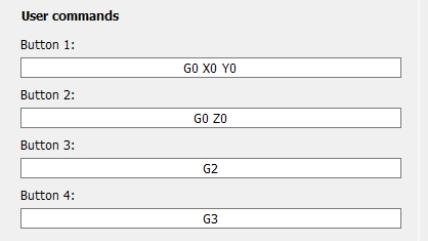
Set button 1 to Home X and Y, set button 2 to Home Z by typing the G code commands shown below.
The home function sets the X, Y and Z positions to 0 respectively, i.e. G0 X0 sets the current X position to 0.
Sending GCode to the Mill
Download the example GCode file from: www.minimillr.com/qsg/demo/hello.nc
This demo file is based around a workpiece of 100x50x6mm, with the word ‘Hello’ cut 2mm into the workpiece. The origin is the lower left corner of the workpiece on the top surface.

Click Open and browse to the hello.nc file and use the preview to see that the tool paths have imported OK.
Connect to the mill and set suitable XY and Z home positions. Set the Z home well above the bed so there is no chance of a collision during the test.
Do a test run by clicking Send without spindle power to start with to make sure the mill moves as expected. Sometimes Candle will pause if there is a tool change command, but this can be set to ‘Ignore’ in Settings or acted on as required.
Milling
If everything looks OK, securely clamp the workpiece to the bed. Set home positions for X, Y and Z to the lower left corner of the workpiece. Use smaller jog step increments, or turn the blue couplings manually to position the tip of the cutter so it is just touching the top surface of the workpiece. Set the home positions. Jog Z to about 20mm above home so there is no chance of the tool scraping along the top surface on the first move.
Connect the spindle to the mill with the red and black connectors and set the speed using the speed control knob. Start the spindle with the red rocker switch and click “Send” to start cutting.
Recommended Speeds and Feeds
It is difficult to give precise feed and speed information, as there are many factors to consider. A safe starting point is 300mm/min and 1mm depth of cut for softer woods like pine.
Soft foams can be cut at around 1000mm/min with a 5mm depth of cut with a 6mm bit. Harwoods like oak should be about a 1 to 2mm depth of cut with a 2mm diameter bit and feeds of 150-200mm/min.
Experiment on a test piece to make sure the motors are not overloaded and working within their limits. If the stepper motors are overloaded, there is a chance of axis slipping and this can ruin a workpiece, so it is prudent to stay within the mills capabilities for best results.
Compatible Software
There are many free software packages that can be used with the Minimillr. Some have design, toolpath creation and machine control integrated for ease of use like Easel from Inventables. Here is a list free software to get started.
Machine Control
Candle
Universal GCode Sender
Easel
2D Drawing Packages
Inkscape
Gravit
3D Packages
Fusion360 (free to home users)
FreeCAD
Blender
TinkerCad
Toolpath Creation (gcode)
KIRI:MOTO
Carbide Create
F-Engrave
LaserGRBL (gcode can be adapted for use on the Minimillr by replacing S commands with G0 Z command)
Easel
MeshCAM
Need More Help?
For further support, advice or questions please email admin@minimillr.com
Best of luck on your CNC journey!