


LaserGRBL is a fantastic free program designed for converting images, pictures and logos into gcode paths so they can be etched with a laser engraver. The good news is that LaserGRBL produces GRBL compatible gcode so you can use it to etch and engrave an image with your CNC router. This engraving method is great for creating customised metal gifts like metal drinks bottles, dog tags, jewellery, nameplates and locker key fobs.
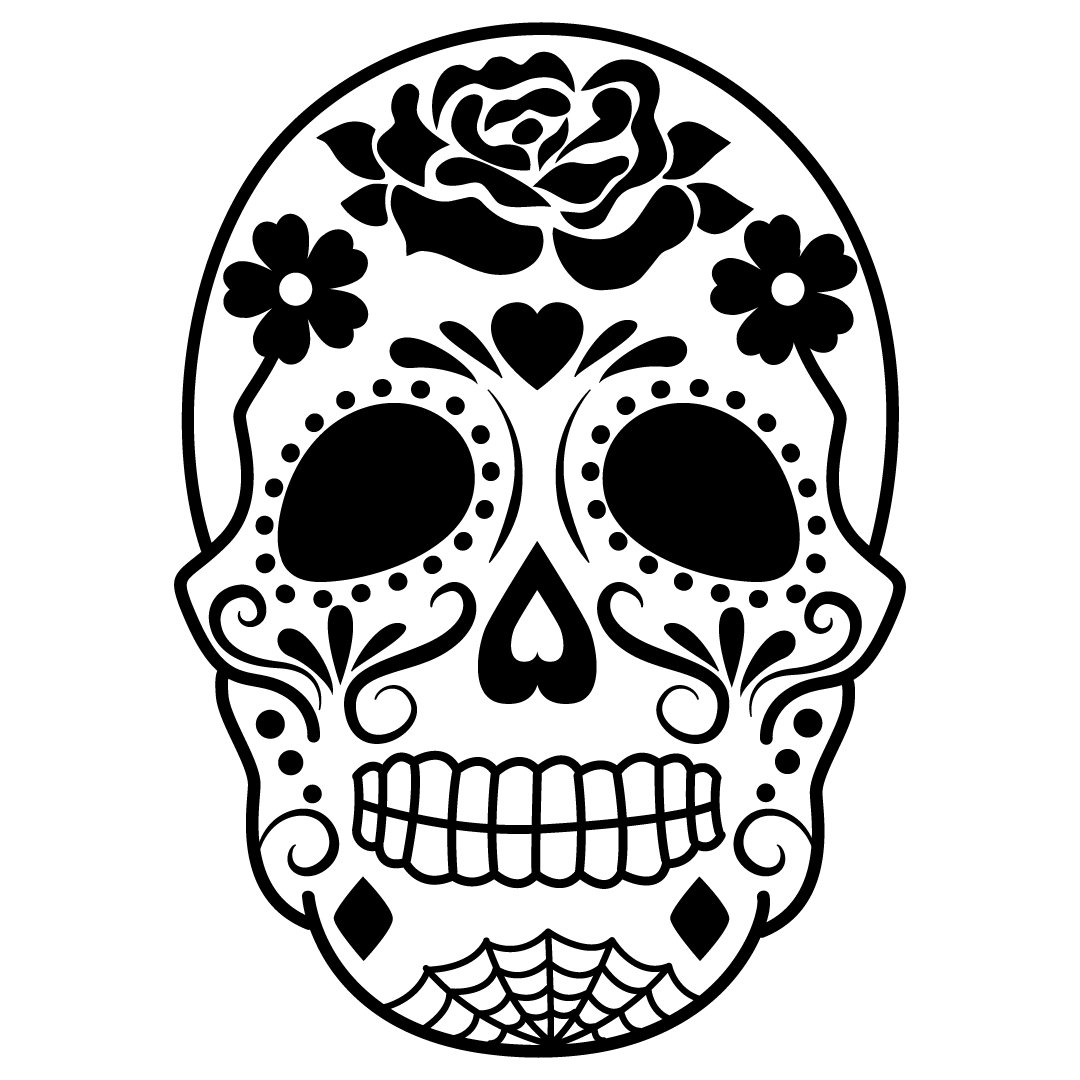
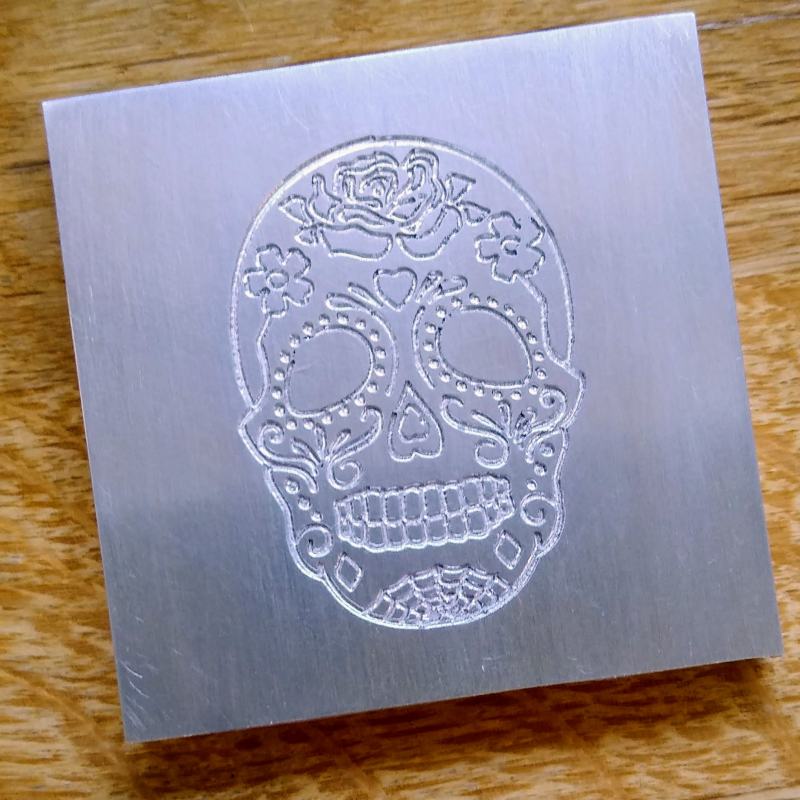
With a few modifications you can take the output from Laser GRBL and covert it so it is compatible with pretty much any CNC router. Using LaserGRBL opens up a lot of creative options so you can engrave an image with you CNC router or mill. First we are going to need a source image to generate the toolpaths. I am using the skull image below. (Right click on image to download) or look for your own free SVG skull images on Google. Save the image as a
Converting an Image to Engraving Paths with LaserGRBL
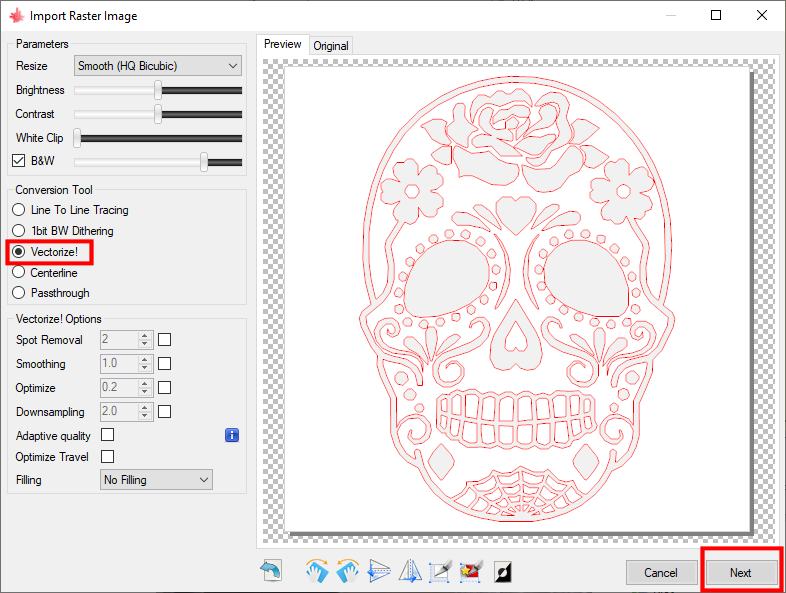
Import the source jpg file into LaserGRBL, and choose ‘Vectorize’ option. This automatically traces round the outline of the image. The best images to use are ones that are high contrast. You can also experiment with the options like ‘Centerline’ that can also achieve good tracing results. The red lines indicate the cut path. Once you have something you think looks acceptable, click Next.

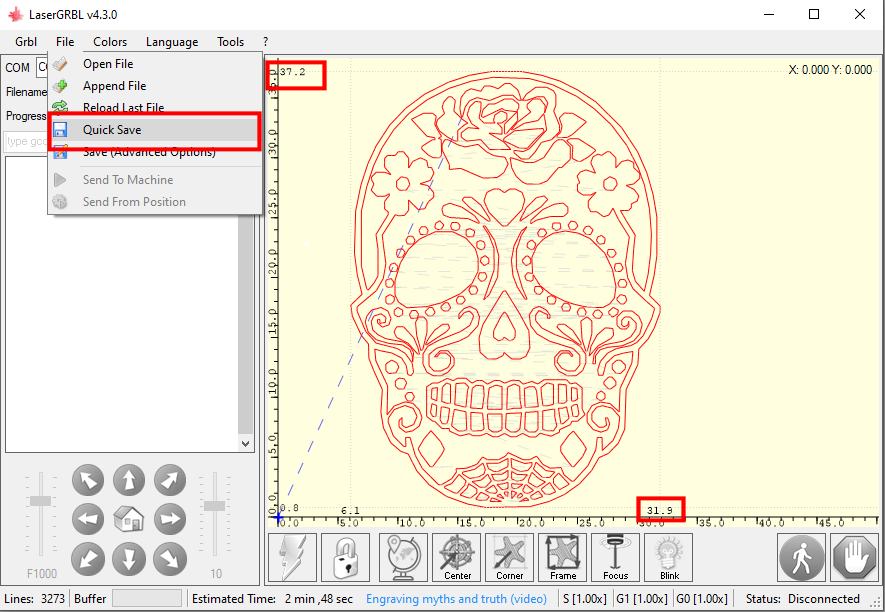
Once the conversion happens, you should see the skull looking like the screenshot below. The overall dimensions are now shown as 37.2mm high x 31.9mm wide as the whitespace. The origin is the lower left corner, so depending on what you are etching on you may need to make some offsets to the origin to get the skull in the correct position on the workpiece.
Click File>Quick Save and save the file to a folder.
Changing Laser Power Commands to Z axis Movements
Open the newly created file in a text editor. You will need one that supports ‘Find and Replace’, like Notepad or Notepad++. The file contents will look like the following. Since the file was created for Laser etching machines, we need to swap the Laser on/off commands with Z down/up position commands instead.
M3 S0

F125
G0 X15.351 Y33.4
S1000

G1 X15.309 Y33.4
G1 X15.242 Y33.756
G1 X15.175 Y34.112
G1 X15.227 Y34.568
G1 X15.278 Y35.023
G1 X15.474 Y35.286
Replace every occurrence of S0 with G1 Z2.0 and every occurrence of S1000 with G1 Z-0.10 so the code looks something like the following.
M3 G1 Z2.0
F125
G0 X15.351 Y33.4
G1 Z-0.1
G1 X15.309 Y33.4
G1 X15.242 Y33.756
G1 X15.175 Y34.112
G1 X15.227 Y34.568
G1 X15.278 Y35.023
This converts all the laser on commands (S1000) to Z down 0.1mm. Similarly, laser off (S0) will rasie the Z axis 2mm above the material. Set this to a lower value if your material is flat, as it will help speed up the engraving time.
Open the gcode file in your CNC router host controller (Candle, UGS, Easel etc) You can see the laser on off commands are replaced with Z up and down commands.
Setting up Engraving on a CNC Router
Clamp the workpiece firmly on the bed of the router and set the Z0 to the top surface of the material. Here we are using a Minimillr 4015PRO with a custom made low profile vice. (plans to be released on a future blog post). Set the XY origin to a suitable position for the workpiece, taking note of the overall size of the etch artwork from LaserGRBL.
I am using a 0.1mm tip 20 degree 3mm carbide engraving bits. If you engrave too deep or fast it can cause the tip to break off the tool, so better to start high and lower the Z origin as the bit bites into the material. Loading the workpiece level and even is important to achieve good results, especially on larger pieces. A spring loaded etching tool really helps here as it can compensate for any Z height variations.
Once you have the finished piece it may need cleaning up on some fine wet and dry to clean off any burrs.
Want to find out more about Minimillr CNC Routers and Mills? Please contact us to and find out more, or download the 4015PRO or 6045PRO brochures.